SugarSort

sugar2

This was inspired by the physics of the game Sugar, Sugar. It’s a neat flash game I remember from my childhood (7 years ago). At the top of each level, there are the words “Sugar, Sugar.” Sugar pours out of the comma, and you must direct it to the various coffee mugs by drawing ramps with the mouse pointer

It’s interesting because it simulates particles only by manipulating pixels – there is no gravitational acceleration, and this allows quite a lot of sugar to be simulated.

so I decided to create a sorting-based physics engine in python. This isn’t about to be implemented into a similar game, mainly because I got sidetracked. Bob Ross says there are no mistakes, just happy accidents. Instead of pulling sugar straight down, this one sorts in random directions to create an interesting pattern. This is a 2-dimensional bubble sort with a twist – it swaps only within single pairs of values, preventing a value from traveling farther than 1 square per frame.

Corrupted Bubble Sort continues…

I wanted a much better image of the curve I produced before I posted a question, so I re-made my algorithm in Python. It has a simple Pygame visualizer.

sortapproachpython1
720×720 Corrupted Bubble Sort, in an early stage of sorting.

Python is plenty fast for these tests, and it allows me to quickly complete simulations with decent settings.

sortapproachpython3
8192 samples, 8192 possible values -> 768×768 screen resolution, completed simulation with derivative.

I represent the derivative of the curve in yellow. Usually this is a rather messy line, because of the large amount of randomness that still exists in the sorted samples. (I also waned the odds of randomization too quickly in the above image, resulting in a misshapen curve with a steeper drop on one side.)

To get a smoother curve, I run many simulations in parallel, then draw the average.

sortapproachparlin4-4096-800-complete-s
The average of 4096 simulations of 800 samples – this is the image I used for my question on Quora.

I posted this question on Quora. Lev Kyuglyak responded that it may be a logistic function that produces a sigmoid curve, and that it could be can be represented in the form:

f(x)={\frac  {L}{1+{\mathrm  e}^{{-k(x-x_{0})}}}}

I am skeptical that my program can create a real sigmoid curve, because those graphs have an infinite domain, while the results of my simulations always have a domain of exactly [0,1]. perhaps my program compresses that infinite distance into a very small space as it approaches the left or right of the array. I’m currently thinking of ways to modify my program to have a much larger domain around the point of inflection.

The first change I’ve tried is to modify the probability of randomization with the difference between a traveling sample and its surroundings. samples that are closer in value to their surroundings have a lower chance of randomization and thus travel farther, perhaps forming larger flat areas at the start and end of the curve.

They kinda do, but not in the way I expected.

sortapproachrelative5-1024x-finished

Weirdness!

Gravo2D

Yesterday I wanted to remake my Gravo project using Pygame. It’s Christmas break, so I was actually able to do that.

Here I represent each particle with a line of a length proportional to its speed:

gravo2d-0-force-spokes

The white lines represent each force acting on a particle at any given time. When two particles pass near each other, the forces grow larger and the lines reach farther.

The twinkling effect is rather cool, but I was more interested in the movement of the ends of those force lines. Further experimentation led me to create this:

gravo2d-a

Here, lines are drawn following each particle, but floating away from it at a distance determined by a force. Each particle has a line corresponding to each other particle. these lines create a figure 8 or an hourglass when two particles slingshot around each other. the color of the line is also determined by the forces acting on a particle (bright green represents a strong horizontal force, bright blue represents a strong vertical force)

I found that I could add at least 64 particles without significant lag:

gravo2d-b-more-particles

Finally, I began to experiment with zooming effects. previously, I have been dimming  the screen and painting over it again to produce the echo. Now I store the current frame to be painted in the background of the next frame.

gravo2d-d-smooth-zoom

Here’s my code:

import random as rand
import pygame
import pygame.event
import math

size = [720,720]
screen = pygame.display.set_mode([1280,720])
pygame.display.set_caption("gravo2d")

back = pygame.Surface([1280,720])

class particle:
	
	def __init__(self, groupSize):
		self.pos = (rand.uniform(0.0,1.77777777), rand.uniform(0.0,1.0)) #start anywhere
		self.vel = (rand.uniform(-0.01,0.01), rand.uniform(-0.01,0.01)) #start with a random velocity
		self.charge = rand.uniform(0.5,1.5)*(rand.randint(0,1)-0.5) #charge varies but is never nearly 0
		self.mass = rand.uniform(0.95, 1.05) #mass affects response to forces
		self.color = [int(128+self.charge*128),0,int(128-self.charge*128)] #particle color is based on charge
		self.forces = [] #all forces between this particle and particles of higher index (longest for the first particles)
		self.forceIndex = 0 #the force currently being edited by the simulation
		self.sharedForce = (0.0,0.0) #the equal and opposite force that the simulator uses for the other particle in the pair
		for i in range(groupSize+1):
			self.forces.append((0.0,0.0))
		self.netForce = (0.0,0.0) #modified many times before being acted upon and reset to 0
		
	def addForce(self, drawOnto, f): #used to inform a particle of the force from another particle.
		#add force to net forces
		self.netForce = (self.netForce[0]+f[0],self.netForce[1]+f[1])
		#color with velocity influencing red component, horizontal force for green and verticle force for blue.
		color = [int(511*abs(self.vel[0]+self.vel[1])),(160*math.atan(10000.0*abs(f[0]))),(160*math.atan(10000.0*abs(f[1])))]
		#represent increase in force with a line who's distance from the particle increases.
		self.drawLine(drawOnto, color, [self.pos[0]-self.vel[0]+self.forces[self.forceIndex][0]*64,self.pos[1]-self.vel[1]+self.forces[self.forceIndex][1]*64], [self.pos[0]+f[0]*64,self.pos[1]+f[1]*64], 4)
		#forces[forceIndex] stores this force until next tick  to start the next line segment at the end of this one. sharedForce holds the last force when recording this force, so that the subseuent simulation of the other particle in this pair can use it later in the tick.
		self.sharedForce = self.forces[self.forceIndex]
		self.forces[self.forceIndex] = (f[0],f[1])
		#next time, dealing with a force from a different particle, remember a different last force.
		self.forceIndex += 1
		return color
		
	def acceptForce(self, drawOnto, f, previous, color): #used when an unknown particle of lower index forces this one.
		self.netForce = (self.netForce[0]-f[0],self.netForce[1]-f[1])
		self.drawLine(drawOnto, color, [self.pos[0]-self.vel[0]-previous[0]*64,self.pos[1]-self.vel[1]-previous[1]*64], [self.pos[0]-f[0]*64,self.pos[1]-f[1]*64], 4)
		
	def move(self): #move based on velocity
		self.pos = (self.pos[0]+self.vel[0],self.pos[1]+self.vel[1])
		
	def react(self): #accelerate based on net force
		self.vel = (self.vel[0]+self.netForce[0]*0.1*self.mass,self.vel[1]+self.netForce[1]*0.1*self.mass)
		self.netForce = (0.0,0.0)
		self.forceIndex = 0
		
	def bounce(self): #bounce off the walls
		if (abs(self.pos[0]-0.88888888)>0.88888889): #left and right sides
			self.vel = (self.vel[0]*-0.9,self.vel[1]*0.9) #reverse direction
			#find new position by mirroring over the edge once past it:
			self.pos = (abs(self.pos[0]) if self.pos[0]0.5): #top and bottom sides
			self.vel = (self.vel[0]*0.9,self.vel[1]*-0.9)
			self.pos = (self.pos[0], abs(self.pos[1]) if self.pos[1]

Corrupted Bubble Sort

Recently, I saw a fascinating imgur post that visually demonstrates how various sorting algorithms work. I wanted to invent some of my own sorting algorithms with visuals, so I started a new scratch project.

The first two algorithms I added to the project were Bubble Sort and another which I don’t know the name of. it traverses the array to find the minimum after this item, then swaps that minimum with the current item and moves to the next item. Simpler and faster than Bubble Sort, but Bubble Sort has more interesting visuals in my opinion.

I really enjoy jumping into projects without doing any research at all, and I actually mirrored some concepts found in FLAC with my blind draft of a lossless audio codec. passes of increasing sample rate, each only storing the inaccuracies of the previous one – this is what I understand bit peeling to be. I’m sure that leaping without looking has a lasting effect on how I understand these things, even after I read the Wikipedia article on them. It also probably delays my exposure to new concepts, but it’s a very fun way to learn…

The visuals of these algorithms are mesmerizing, and I think they would make good screen savers. That’s what led me to modify the Bubble Sort algorithm to never finish. Each time two array items are switched, each has a very low chance of being set to a random value. I expected it to look like a normal Bubble Sort, with just a bit of noise to make the odds of it finishing very low.

But I did not get chaos.

stagesortapproach

This uses only random values.

I’ve modified my program so that the chances of an item being randomized decrease over time, so this program will eventually halt with a nearly perfect curve.

Here’s what I notice:

  • samples with extreme values often travel the farthest.
  • samples that come to rest near the edges hardly ever change
  • samples near the middle, being more random, are swapped and randomized most often.
  • Samples that travel farther have a greater chance of being randomized again before coming to rest.
  • samples approaching the edges can only randomize samples with less extreme values.
  • samples near the edges, when randomized, often become less extreme and move towards the center.

so what is the curve? it looks like part of a sine wave, or perhaps an arctangent.

But since everything about the process is linear – the increasing probability of randomization with increasing number of swaps – or increasing exponentially, e.g. the increasing probability of randomization in the wake of a traveling sample as it randomly creates more samples that will travel… It might be the integral of a parabola. I’m not sure how, but I won’t rule it out.

This is a Quora question if I’ve ever seen one. I’m just waiting to get a better screenshot. the odds of randomization are now 162:1 and increasing.

…finished!

stagesortapproachf

It doesn’t look like a sine wave to me – but maybe that’s because the odds against getting extreme samples were so high that the crest and trough couldn’t be built before I terminated it. There’s a small chance that I’ve discovered a new way to calculate some constant like π or e. but I still don’t know what kind of curve it is.

To the internet!

Pygame mandelbrot

I’d like to share my progress on a new project. I’ve had a couple of breakthroughs, but I haven’t found the time to post them. I’ve created a Mandelbrot generator in python. It was based on the successful ASCII-output Mandelbrot generator, and it still uses a console window to receive input.

It started with the ancient tradition of using screen coordinates as color values because your code is producing a blank screen and you don’t know why.

screenshot_2016-11-08_09-35-43
(using x+y as a color index)

This was also a great way to test my color palette, which I eventually refined into a very simple Red->violet->Blue->Green sequence that I’ve never seen in another generator:

MandelPy-3-color-palette

MandelPy-3-color-palette-2

I’ve performed many experiments with this generator, which I hope to post someday. I’ve replaced the input handler with a loop that modifies certain parameters, and I’ve produced some attempts at a slowing expression that uses z -> z^(m+1) + (m*C) with m moving from 1 towards 0 as |z| increases. The point of that is to produce a final resting place of the process without using a simple escape threshold or limit. It cuts off when m drops below a certain value. Here’s what that looks like:

mandelpy-m-decays-then-angle-is-found
Color = termination angle

I’ve also created some sequences with varying escape threshold size and shape, to help demonstrate the areas that certain groups of points mostly live in. Here’s a frame from a sequence with an expanding threshold:

mandelpy-animated-expanding-threshold-crucifix-angle-iter
Colored with angle and iteration count

I’ll convert these PNG sequences to GIF’s and upload them here soon.

Scratch Mandelbrot Again

I love Scratch, and Python. They are so slow, yet they are so fast to develop with… When I started experimenting with c++, it was weeks before I even saw my fractal on the screen. (then it was calculated about 4,000 times as quickly as these images were)

The scratch Mandelbrot generator series isn’t meant to be fast. It is ideal – It will have all of my favorite features. It will allow me to test new mathematical concepts easily (more of this later). It may be a place to draft these ideas before I implement them in Java or something.

I started by improving the colors in Mandelbrot 2. This was a huge task, because I acted on the misconception that the full color wheel of the pen was only available in scratch projects created after a certain date – so I re-created the entire program in another project.

I later disproved this theory about the pen, and I can’t really come up with a new one. it breaks pretty easily if I change the color with a numeric value before a using a color constant, or within too short a time after starting the project, and in other odd situations.

screenshot-2016-10-21-at-17-26-46
https://scratch.mit.edu/projects/126896952/

I focused mostly on improving efficiency and readability – I got rid of the global “running” variable, and made it possible to stop and start the program without restarting generation progress.

screenshot-2016-10-21-at-17-08-09

But all of this is moving towards an ultimate goal of inventing new ways of visualizing and measuring the Mandelbrot set and other Julia sets. I’ve dreamed of creating a set without edges of any kind. and not just by blurring the lines like Xaos does… I want a set that’s not quantized at all.

and angular coloring seems like a good place to start. You can see this is the header image at the top of my site, which I generated with Xaos.

Here’s me using atan(zi/zr) and atan((zi-zio)/(zr-zro)) as the color:

screenshot-2016-10-28-at-09-03-44-edited-angularscreenshot-2016-10-28-at-09-50-47-edited-angular

The second image has the angular result multiplied by 0.2, and added together with the iteration count. This gives the glow around the edges of the set.

Here’s when I simply use zi as the color:

screenshot-2016-10-29-at-09-38-12-edited-zi

The yellow escapes above the real axis, the purple escapes below the real axis.

All of this has been done before. In fact, Xaos combines it all into one application. I’m going to try something new. This is the beginning of an attempt at an unquantized set…

When a group of points is moving towards a higher iteration level, their escape point is only slowly dropping towards the origin. When they finally drop below escape radius, and the equation must be iterated one more time, the new escape point is pretty far away – and the set is quantized no matter what math you use on the escape point.

So I’m going to measure the real point of escape: where the last line segment formed by the last two points crosses the escape circle.

Here’s my implementation of the quadratic formula:

screenshot-2016-10-29-at-11-23-59-edited

Where zr is the real component of the escape point, zi is the imaginary component, and zro and zio are the previous point.

Where m is the slope of the escape line segment, and b is the y intercept of the escape line segment, and A, B, and C are the three coefficients of the quadratic formula.

A more detailed explanation of the math is embedded in the project.

https://scratch.mit.edu/projects/128071393/

Before I started testing this math, I made a few tweaks to allow the generation other Julia sets. So here’s a Julia Set from the seed -0.3-0.9i

I went from this:

screenshot-2016-10-28-at-19-53-07-edited-angular

to this:

screenshot-2016-10-28-at-19-55-01-edited-exact

The yellow strips, corresponding to higher angles relative to the origin, now tilt towards the nearest tips of the prominent features of high iteration count.

I would characterize good outcoloring as that which helps you identify features you would have otherwise missed. So I can’t wait to test this algorithm in a compiled language.

screenshot-2016-10-28-at-17-18-35-edited-angular

screenshot-2016-10-28-at-17-15-24-edited-exact

It really reminds me of a block of ray-traced ripply glass inside a red and yellow world.

screenshot-2016-10-28-at-20-05-31-edited-angular

screenshot-2016-10-28-at-20-01-22-edited-exact

Now that I have two new outcoloring modes, I’ll divide one by the other just for giggles:

screenshot-2016-10-28-at-20-11-10-edited-quotient

Obviously, none of these are images of a truly unquantized set. This is because a point from an area which almost escapes will still travel quite a distance upon their next iteration. And, rather than gracefully leave the escape radius at a point not far along the next line segment (as they would if the next line segment had nearly the same slope), they fall back away from the escape circle at an acute angle – actually dropping in absolute value before they escape a couple radians away.

I have a few more ideas.

I’m also taking major steps in the direction of using clones for a multithreaded approach, as well as rendering a simple Julia set based on the context of the Mandelbrot set.

You can view all of my code here

Gravo

I brought my laptop with me on a two hour car trip, with the intent of setting up a hotspot and catching up on some work. When we drove out of verizon’s reach, that became impossible. so Gravo happened instead.

orbitmono_1

Gravo is a particle simulation in Unity3D. It’s name is a play on the word gravity and the word o. The entire Gravo world consists of a template sphere with one script. This script gives the sphere a random position and velocity, and then registers itself with the SphereManager, a script attached to a nearby cube. When I click, a script on the camera instantiates this sphere.

The SphereManager is responsible for all forces acting on the spheres. it loops through each of them and applies a force towards each of the others. it will reuse these calculations to apply an opposite force on the others, so that they have fewer calculations to do when it’s their turn. Each sphere in the array will only act on spheres of a higher index.

On the trip back, I wanted to model the atom, so I implemented particles of positive and negative charges. At first, they modeled molecules better:

redblue-s

But I wanted to model the atom. So I added neutrally charged particles and colored them yellow. I wasn’t sure how the nucleus of an atom was held together, so I just added a powerful attractive force between the protons and the neutrons until I could do some real research.

Here are some electrons orbiting a positive nucleus:

orbit-s

As soon as I added a third type of particle, I realized it was inefficient to keep asking the SphereBrain scripts what the charge of the particle was every single frame. I also didn’t want a parallel array. So my SphereManager, as it stands now, inserts a particle into the array based on its charge, and later uses its index to get the charge without asking the particle’s script.

using UnityEngine;
using System.Collections;

public class SphereManagerScript : MonoBehaviour {

    public ArrayList spheres = new ArrayList();
    public int protonCount;
    public int electronCount;
    public int neutronCount;

    // Use this for initialization
    void Start () {

    }

    // Update is called once per frame
    void Update () {
        GameObject a;
        GameObject b; //the two objects to interact
        int aCharge;
        int bCharge; //their charges
        float dist; //the distance between them
        Vector3 dir; //the direction from the second to the first
        Vector3 force; //the force that will act on them both
        for (int i = 0; i + 1 < spheres.Count; i++) {
            a = ((GameObject) spheres[i]); //select a
            aCharge = (i  protonCount + electronCount)? -1 : 0); //determine a's charge based on its index
            for (int j = 1; i + j < spheres.Count; j++) {
                b = ((GameObject) spheres[i+j]); //select b
                bCharge = (i+j  protonCount + electronCount)? -1 : 0); //determine b's charge based on its index
                dist = Vector3.Distance(a.transform.position, b.transform.position);
                dir = (a.transform.position - b.transform.position).normalized;
                force = ((-128f * aCharge * bCharge) + ((aCharge+bCharge==1)? 128f : 0.0f)) * dir / (-dist * dist); //calculate final force
                a.GetComponent().AddForce(force);
                b.GetComponent().AddForce(-force);
            }
            this.gameObject.transform.position = Vector3.Lerp(this.gameObject.transform.position, a.transform.position, 0.1f); //move this invisible cube (which also carries the camera) nearer to the current sphere, to smoothly follow the group
        }
        for (int i = 0; i  36) { recall(a); }
        }
    }

    public void register(GameObject toRegister) { //method to register a sphere for physics calculations. the spheres call this method when they are created.
        int charge = toRegister.GetComponent().charge; //you only need to check this once, the position in the array will be used to determine the charge from now on.
        if (charge == 1) {
            spheres.Insert(0, toRegister); //put it at the start of the proton section (index 0)
            protonCount++;
        } else if (charge == -1) {
            spheres.Insert(protonCount, toRegister); //put it at the start of the electron section
            electronCount++;
        } else if (charge == 0) {
            spheres.Insert(protonCount+electronCount, toRegister); //put it at the start of the neutron section
            neutronCount++;
        }
    }

    public void recall (GameObject toRecall) { //method for handling particles that get too far away (it kills them)
        int charge = toRecall.GetComponent().charge;
        if (charge == -1) { electronCount--; } else if (charge == 1) { protonCount--; } else if (charge == 0) { neutronCount--; }
        spheres.Remove(toRecall); Destroy(toRecall); //unregister and destroy
    }
}

using UnityEngine;
using System.Collections;

public class SphereBrain : MonoBehaviour {

    public int charge = 0;
    //string type;
    // Use this for initialization
    void Start () {
        GameObject sphereMgr = GameObject.FindGameObjectWithTag("SphereManagerTag");
        this.gameObject.transform.position = sphereMgr.transform.position + new Vector3((Random.value) * 15.0f, (Random.value-0.5f) * 15f, (Random.value-0.5f) * 15.0f);
        this.gameObject.GetComponent().velocity = (new Vector3((Random.value-0.5f) * 1f, (Random.value-0.5f) * 1f, (Random.value-0.5f) * 1f));

        recolor();
        sphereMgr.GetComponent().register(this.gameObject);
    }

    void recolor () { //handles the changing of all properties, not just color.
        this.gameObject.GetComponent().material.SetColor("_Color", (charge > 0)? Color.red : ((charge < 0)? Color.blue : Color.yellow));
        if (charge == 0) {
            this.gameObject.GetComponent().mass = 1.05f;
            this.gameObject.GetComponent().localScale = 1.2f * Vector3.one;
        } else if (charge == -1) {
            this.gameObject.GetComponent().mass = 0.05f;
            this.gameObject.GetComponent().localScale = 0.2f * Vector3.one;
            this.gameObject.transform.position = new Vector3(this.gameObject.transform.position.x -15, 0, this.gameObject.transform.position.z);
            //this.gameObject.GetComponent().AddForce(Vector3.up * 50); //specifically for helpng build atoms
        }
    }
	
    // Update is called once per frame
    void Update () {}
}


This code still has a problem I haven’t worked out yet. I’m not unregistering spheres properly, and I think the neutrons are becoming protons when they shift left in the array:

unstable5

I’m looking forward to refining it.

Reducing signal noise

Last Sunday, I walked into a restaurant thinking about how to embed a watch screen in the back of your hand. Specifically, how to inject yourself with luminescent ink and light up different areas of ink by sending currents through your skin.

I imagined that they could be powered from beneath the skin by small beads with little oscillators in them – that would amplify a signal at the proper frequency. That wasn’t what I was focused on at the time. But I immediately realized that if the signals were interpreted so loosely, even the bars that were supposed to be dark might be dimly lit by the noise of all the others.

My goal in this project is to reduce the maximum number of simultaneous signals to display any digit. The signals will be the power source, and no logic gates of any kind can be used.

Now the simplest design would be one in which there was a frequency for each bar of each digit, totaling 28 for the entire watch face. assume the colon has no signal.

 _   _     _   _
|_| |_| * |_| |_|
|_| |_| * |_| |_|

I immediately started looking for repeatedly used selections of bars. I could then give each of those bars a detector for the signal that lights up the group, alongside their detectors which tell them to light up individually.

In my first experiment, I isolated groups of:
-the two on the right (used in 0, 1, 3, 4, 7, 8, and 9)
-the two on the left (used in 0, 6, 8, and 9)
-the three in the middle (used in 2, 3, 5, 6, 8, and 9)

basis:  _       _   _       _   _   _   _   _
    :  | |   |  _|  _| |_| |_  |_    | |_| |_|
    :  |_|   | |_   _|   |  _| |_|   | |_|  _|
 _  :   _       _   _           _   _   _   _
|_  :  |        _|  _  |_  |   |_      |_  |_
|_  :  |_      |_   _        | |_|     |_   _
 _  :   _       _   _           _   _   _   _
 _| :           _|  _  |_  |    _       _  |_
 _| :   _      |_   _        |  _|      _   _
    :   _                           _
| | :            |     |_  |               |
| | :   _      |             |   |
bottom implies top
thus
    :                               _
    :            |     |_  |               |
    :   _      |             |   |
    :   3   1   2   2   3   3   3   2   3   3
max of 3 signals active at once
2 detectors per bar
10 signal types total
sum of 25 signals to display all digits

The shapes on the left indicate which part has been isolated.
The numbers then summarize how many signals were necessary to create the digit. They are the sum of the number of group-signals used and the number of individual bars that remain.

Then I noticed several places where the bottom left and top right / top left and bottom right were being used together, and I tried it again, this time starting out with those groups.

basis:  _       _   _       _   _   _   _   _
    :  | |   |  _|  _| |_| |_  |_    | |_| |_|
    :  |_|   | |_   _|   |  _| |_|   | |_|  _|
 _  :   _       _   _       _   _   _   _   _
 _| :    |   |  _|  _|  _|  _   _    |  _|  _|
|_  :  |_    | |_   _|      _  |_    | |_   _
 _  :   _       _   _       _   _   _   _   _
|_  :        |  _   _|  _|  _   _    |  _   _|
 _| :   _    |  _   _|      _  |_    |  _   _
    :   _                           _
| | :        |       |  _|           |       |
| | :   _    |       |         |     |
 _  :   _                           _
|_  :                   _|                   |
|_  :   _                      |
bottom implies top
thus
    :                               _
    :                   _|                   |
    :   _                      |
    :   3   1   2   2   3   2   3   2   3   3
max of 3 signals active at once
2 or 3 detectors per bar
10 signal types total
sum of 24 signals to display all digits

This time I left out the group of the left two, because they weren’t necessary. I still have 10 unique frequencies, because while I added two new groups, there are now two bars that I never need to address individually. But I only managed to reduce the number of signals for the digit 5, and I added an extra detector to all of the vertical bars. My goal is still to reduce the charge in bars that aren’t supposed to be glowing, and increasing the number of frequencies they’re listening for is going to do more harm than good.

I wanted to start over and get an even better outcome, so I sectioned off part of my text document and started making observations.

=============================
        _       _   _       _   _   _   _   _
       | |   |  _|  _| |_| |_  |_    | |_| |_|
       |_|   | |_   _|   |  _| |_|   | |_|  _|
notes:
top left implies middle whenever not bottom left
bottom implies top always
top implies bottom except for in 7
bottom left implies top right except (when top left : once, in 6).
top left implies bottom left except (when bottom right : thrice, in 4, 5, and 9).
=============================

I don’t know why it took me so long… but after watching myself make a list of simple observations, I finally realized that I needed to write an algorithm. probably in python.

I haven’t written that algorithm, because I suddenly became very distracted. could this be used to compress things?

*Gasp*

It is identifying samples by their common traits. I can probably do that with sound. The first common trait between samples of audio that pops into my head is their closeness to the average of the last n samples. Instead of identifying a 16 bit number with 16 bits, it could be identified by 4 nibbles with unique purposes:
-The first represents the closeness of the sample to the average of the last 256 samples, i.e. the weight of that average in a mean which determines the sample.
-The second represents the closeness of the sample to the average of the last 1024 samples.
-The third represents the closeness of the sample to the average of the last 4096 samples.
-The fourth represents an offset, in case the first 3 can’t come close to representing the new sample.

Obviously, this set of specialized nibbles is just as large as the 16 bit integer they represent. But they don’t need to be saved. They could just be incremented and decremented, maybe even in turn. In my mind this could result in 2 different systems:

-The simple one, which multiplies the 3 averages by their respective nibbles, adds them together, divides by 48, and adds the offset.

-One in which the decoder is very smart. It rounds numbers intelligently to make sure that every change has an immediate result, and that almost any sample can suddenly be represented even if it doesn’t follow the pattern. For instance, if the 4096-sample average was very close to zero, giving it a weight between 0 and 15 would barely impact what the sample was calculated to be. In this case the nibble representing the weight wouldn’t want to indicate a weight that was linearly related to the value of the nibble… each of the nibble’s 16 values will instead indicate weights at which the 4096-sample average has a large impact.
A weight of 16 doesn’t mean to multiply this 4096-sample average by 16 when finding the mean. 16 is the MAXIMUM. 16 means “multiply this 4096-sample average by the largest possible coefficient that won’t cause the sample to clip after finding the mean and adding the offset”
The value of the nibble will literally indicate the distance between 1 and this largest possible coefficient. Or perhaps the square root of the distance.

The systems could also be mixed.

Operation: Catapult

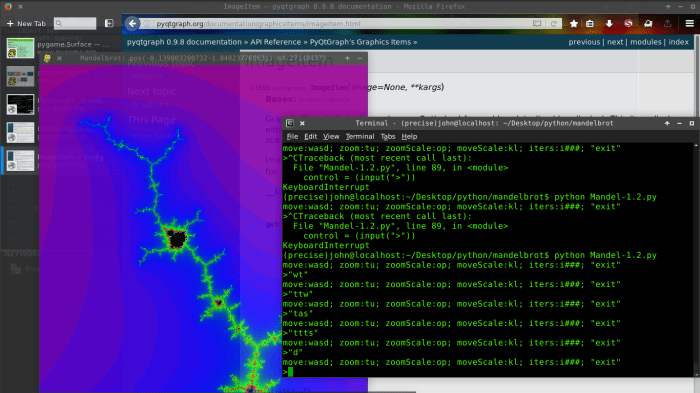
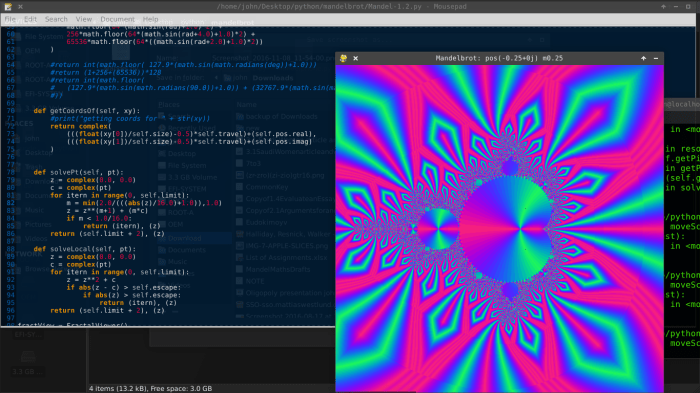
One day in the spring of 2016, I wasn’t able to make my internship, so I found myself in my actual Computer Programming II “cover class” that was displayed on my schedule. That day I was introduced to Python. I didn’t have the time to finish the customary Mandelbrot generator to put the new language through its paces. I didn’t know much about python by the end of the day either.

That summer, I had the great privilege of visiting Rose-Hulman for 2 1/2 weeks. I immediately joined computer programming, because I wanted to learn Python for real.

I was surprised to learn that python is MAGIC. This xkcd put it well:

python

During my too-short stay in paradise, I finally learned how to work in a group. We used Dropbox instead of Git, for some reason.

I had originally planned to work alone and create a simple lossy image format (which I’m still interested in doing) until our professor convinced me to work in a group instead. Something about not having enough time to complete such a large project going solo. At the time all I could hear was him asking me to aim lower, but I’m thankful that I chose the group project now. It probably presented greater challenges and taught me more anyway – I’m already onto lossy compression techniques. Game design? Other people? Conforming to someone else’s master plan? Not so much yet.

I’m only going to release the code I contributed at this time.


file stickmanFigure3.py:

#06.24.16

import pygame
from stickmanSprite6 import *
from pose import *
import animationLib3 as animLib
import animationUtility as animUtil
import time

class StickmanFigure:

    def __init__(self, figureName = "Tom", expression = "Angry", scale = [1, 1], hasTail = True, drawMan = True, currentAnimName = "IDLE", mssg = ""):
        self.figureName = figureName
        self.message = mssg
        self.currentAnimName = currentAnimName
        self.contentSprite = StickmanSprite(figureName, expression, hasTail) #the main sprite
        self.animFrame = 0 #the current frame of the animation
        self.frame = 0 #the total number of frames ever
        self.baseDuration = 12.0 # the number of frames which pass between each keyframe
        self.currentAnim = animLib.getAnim(currentAnimName)
        self.currentAnimLength = animUtil.frameCount(self.currentAnim, self.baseDuration)
        self.drawMan = drawMan
        self.tempDrawMan = True
        self.scale = scale
        
    def doAnimation(self, animationName):
        self.animFrame = 0
        self.currentAnimName = animationName
        self.currentAnim = animLib.getAnim(self.currentAnimName)

    def draw(self, target, coords, scale):
        tailDirection = scale[0] / abs(scale[0])
        scale = (abs(scale[0]), scale[1])
        scale = self.scale
        if self.drawMan:
            if self.animFrame >= self.currentAnimLength:
                self.doAnimation(self.currentAnimName)
            if not self.contentSprite.editing_isEditing:
                self.contentSprite.setPose(self.getPose())
                self.animFrame += 1
            self.frame += 1
        return self.contentSprite.draw(target, coords, scale, tailDirection)

    def getPose(self):
        #print("StickmanFigure: StickmanFigure: getPose: calculating based on anim " + str(self.currentAnim))
        return  animUtil.terpAnim(self.currentAnim, self.baseDuration, self.animFrame)
        #print("StickmanFigure: StickmanFigure: getPose: and now the animation is  " + str(self.currentAnim))
        #print("StickmanFigure: StickmanFigure: getPose: returning " + str(result))
        

description:

The StickmanFigure class is responsible for running requested animations and manipulating a StickmanSprite object. It is the highest level class I wrote, and can be implemented directly into any project that uses pygame.


file stickmanSprite6:

#06.24.16

import pygame
import os
from pose import *
import math

class StickmanSprite:

    face = pygame.Surface((32,32))

    def __init__(self, identity = "Tom", expression = "Angry", hasTail = True):

        #identity ----------------------------------------------------------------
        self.identity = identity #used in getting face image from resources
        self.expression = expression #used in getting face image from resources

        #pose data ---------------------------------------------------------------
        self.basePose = [[35,100], [65,100], [50,50], [50,30], [35,60], [65,60]] #the default locations of all parts. poses are added to this.
        self.currentPose = [[0,0], [0,0], [0,0], [0,0], [0,0], [0,0]] #the current pose, can be used to access the pose which is in use.
        self.drawPose =  [[0,0], [0,0], [0,0], [0,0], [0,0], [0,0]] #the pose which is editable and drawable (basePose + currentPose = drawPose)
        self.drawPose = Pose.add(self.basePose, self.currentPose) #initialize drawPose

        #configuration -----------------------------------------------------------
        self.headResponse = 0.6 #effect of pose on head angle
        self.hasTail =hasTail #enable/disable tail feature
        self.tailWavelength = 32 #number of frames for a full cycle of tail wiggle amplitude
        self.tailLength = 0.5 #shorten tail to the specified length without changing the wave
        self.tailAmplitude = 0.01 #multiplier for tail wiggle amplitude
        self.tailHeights = [0,10,18,24,26,24,18,10,0,-10,-18,-24,-26,-24,-18,-10] #approximation of a sine wave
        self.foreground = [0,0,0] #foreground color
        self.background = [220,220,220] #background color
        #self.aa = True #enable/disable antialiasing. this is no longer available.
        self.lineWidth = 3

        #other --------------------------------------------------------------------
        self.editing_isEditing = False #when True, the stickman can be editied by clicking and dragging parts, to get pose information
        self.editing_clicked_left = False #whether the stickman is being clicked during editing
        self.editing_clicked_right = False
        self.timesDrawn = 0 #number of frames the stickman has been drawn in. used in tail calculations!
        self.framePhase = 0 #cached tail wiggle amplitude for this frame (instead of recalculating for each pixel.) this is calculated at the start of draw()
        self.face = pygame.image.load(self.identity + "_" + self.expression + ".png") #his face
        #self.face = self.face.convert()
        #self.face.set_alpha()
        #self.face.set_colorkey([255,255,255])

        #constants ----------------------------------------------------------------
        self.PI = 3.141592653589793238462643383279502884197169399375
        self.TAU = self.PI * 2


    def setPose(self, newPose): #set the pose of the stickman
        self.currentPose = newPose
        self.drawPose = Pose.add(self.basePose, self.currentPose)

    def draw(self, target, coords, scale, tailDirection = 1):
        if self.editing_isEditing:
            self.edit(coords, scale)  #edit while drawing
        self.timesDrawn += 1
        #self.framePhase = float(math.sin((self.timesDrawn / self.tailWavelength) * math.pi * 2)) * 100000000000000000.0
        self.framePhase = self.timesDrawn%self.tailWavelength - (self.tailWavelength/2)
        #self.framePhase = self.timesDrawn%self.tailWavelength
        #self.thisSurface.fill(self.background) #clear the main surface
        pygame.draw.line(target, self.foreground, [self.drawPose[0][0]*scale[0]+coords[0],self.drawPose[0][1]*scale[1]+coords[1]], [self.drawPose[2][0]*scale[0]+coords[0],self.drawPose[2][1]*scale[1]+coords[1]], self.lineWidth) #draw left leg
        pygame.draw.line(target, self.foreground, [self.drawPose[1][0]*scale[0]+coords[0],self.drawPose[1][1]*scale[1]+coords[1]], [self.drawPose[2][0]*scale[0]+coords[0],self.drawPose[2][1]*scale[1]+coords[1]], self.lineWidth) #draw right leg
        pygame.draw.line(target, self.foreground, [self.drawPose[2][0]*scale[0]+coords[0],self.drawPose[2][1]*scale[1]+coords[1]], [self.drawPose[3][0]*scale[0]+coords[0],self.drawPose[3][1]*scale[1]+coords[1]], self.lineWidth) #draw torso
        pygame.draw.line(target, self.foreground, [self.drawPose[4][0]*scale[0]+coords[0],self.drawPose[4][1]*scale[1]+coords[1]], [self.drawPose[3][0]*scale[0]+coords[0],self.drawPose[3][1]*scale[1]+coords[1]], self.lineWidth) #draw left arm
        pygame.draw.line(target, self.foreground, [self.drawPose[5][0]*scale[0]+coords[0],self.drawPose[5][1]*scale[1]+coords[1]], [self.drawPose[3][0]*scale[0]+coords[0],self.drawPose[3][1]*scale[1]+coords[1]], self.lineWidth) #draw right arm
        if self.hasTail:
            self.drawTail(target, coords, scale, tailDirection) #draw tail
        if scale == [.5,.5]:
            stickmanHead = pygame.transform.rotate(self.face, Pose.getHeadRot(self.drawPose) * -self.headResponse)
            stickmanHead = pygame.transform.scale(self.face, (int(64*scale[0]),int(128*scale[1])))
            posx = 64*scale[0] - 145*scale[0]
            posy = 64*scale[1] - 150*scale[1]
            target.blit(stickmanHead, ((int(self.drawPose[3][0]+posx)+coords[0]),int((self.drawPose[3][1]+posy)+coords[1])))  #special_flags=pygame.BLEND_RGB_MULT
        else:
            stickmanHead = pygame.transform.rotate(self.face, Pose.getHeadRot(self.drawPose) * -self.headResponse)
            stickmanHead = pygame.transform.scale(self.face, (int(64*scale[0]),int(128*scale[1])))
            target.blit(stickmanHead, ((self.drawPose[3][0]-32)*scale[0]+coords[0],(self.drawPose[3][1]-60)*scale[1]+coords[1]))#target.blit(self.thisSurface, (0,0))
        return stickmanHead


    def drawTail(self, drawOnto, coords, scale, direction):
        tailSpacing = self.tailLength * direction * 50 / len(self.tailHeights)
        #print(str(tailSpacing))
        for index in range(len(self.tailHeights)-1):
            #print(str(index))
            pygame.draw.line(drawOnto, self.foreground,
                               [(tailSpacing*(index+0) + self.drawPose[2][0])*scale[0] + coords[0], (self.drawPose[2][1] + self.tailHeights[index+0]*self.tailAmplitude*self.tailHeights[int(self.framePhase%len(self.tailHeights))])*scale[1] + coords[1]],
                               [(tailSpacing*(index+1) + self.drawPose[2][0])*scale[0] + coords[0], (self.drawPose[2][1] + self.tailHeights[index+1]*self.tailAmplitude*self.tailHeights[int(self.framePhase%len(self.tailHeights))])*scale[1] + coords[1]],
                               self.lineWidth)

    def toggleEdit(self):
        self.editing_isEditing = not self.editing_isEditing
        if self.editing_isEditing:
            print("left click to adjust nearest part, middle click to print pose")

    def edit(self, coords, scale):
        #print("editing stickman...")
        relativePos = pygame.mouse.get_pos()
        relativePos = [(relativePos[0]-coords[0])/scale[0],(relativePos[1]-coords[1])/scale[1]]
        editingPoint = self.getClosest(relativePos)
        if self.editing_clicked_left and (not pygame.mouse.get_pressed()[0]): #whenever the mouse button is released
            self.reversePose() #determine the actual pose, which is the difference between the current pose and the base pose
        if self.editing_clicked_right and (not pygame.mouse.get_pressed()[1]):
            print(str(self.currentPose)) #print the current pose for use in an animation
        self.editing_clicked_left = pygame.mouse.get_pressed()[0]
        self.editing_clicked_right = pygame.mouse.get_pressed()[1]
        if self.editing_clicked_left:
            self.drawPose[editingPoint] = relativePos
            #print("    Moving a point... clicked==" + str(clicked))

    def getClosest(self, testPosition):
        distance, index = min((dist, ind) for (ind, dist) in enumerate(Pose.getDistance(testPosition, test) for test in self.drawPose)) #I do not understand this statement, but it works
        return index

    def reversePose(self):
        #print("reversing pose...")
        #print("drawPose: " + str(self.drawPose))
        #print("basePose: " + str(self.basePose))
        #print("changing current pose from " + str(self.currentPose))
        self.currentPose = Pose.add(self.drawPose, Pose.neg(self.basePose))
        #print("to " + str(self.currentPose))

description:

The StickmanSprite class is a system for drawing a stick man based on an adjustable Pose. It also functions as the tool for creating animations – if the game is launched while isEditing = True, you can drag around the stick man’s limbs to set his pose. When you middle-click the stick man, the current pose will be printed in the console. Do this once for each keyframe, then copy all the lines from the console into the animation library and give the animation a name. It’s a fast system.

The sprite also handles facial expressions by loading images from a directory based on the character’s name and specified emotion. The head tilts to match the body at all times based on simple mathematical rules. It also has a tail, so that we could use it as a monkey when necessary. The tail, like the head, is not directly controlled by the pose.

I chose “Tom” as the name of the starter character as a reference to Tom’s Diner. Although in testing my own audio codec, I went my own way and decided on “Don’t Stop” by Foster The People – The Fat Rat’s remix.


file pose.py:

class Pose:

    LFOOT = 0
    RFOOT = 1
    WAIST = 2
    NECK = 3
    LHAND = 4
    RHAND = 5


    def __init__(self):
        pass   #it is possible, but pointless, to instantiate this empty class


    @staticmethod
    def neg(in1):
        result = [[0,0],[0,0],[0,0],[0,0],[0,0],[0,0]] #empty ffwnhh pose
        for i in range(len(in1)): #for all in the first dimension
            for ii in range(2): #for all in the second dimension
                result[i][ii] = -in1[i][ii] #set to the opposite of the input
        return result[:]


    @staticmethod
    def add(in1, in2):
        result = [[0,0],[0,0],[0,0],[0,0],[0,0],[0,0]] #empty ffwnhh pose
        for i in range(len(in1)): #for all in the first dimension
            for ii in range(2): #for all in the second dimension
                result[i][ii] = in1[i][ii] + in2[i][ii] #add them to the answer
        return result[:]


    @staticmethod
    def multiply(in1, in2):
        result = [[0,0],[0,0],[0,0],[0,0],[0,0],[0,0]] #empty ffwnhh pose
        for i in range(len(in1)): #for all in the first dimension
            for ii in range(2): #for all in the second dimension
                result[i][ii] = in1[i][ii] * in2 #multiply them into the answer
        return result[:]


    @staticmethod
    def lerpPoints(point1, point2, distance):
        displacement = [point2[0]-point1[0], point2[1]-point1[1]]
        progress = [displacement[0]*distance,displacement[1]*distance]
        result = [point2[0]-progress[0],point2[1]-progress[1]]
        return result
        

    @staticmethod
    def lerp(pose1, pose2, distance):
        #print("pose: Pose: lerp: ----------------------------------------------------------------------")
        #print("pose: Pose: lerp: given a distance of " + str(distance))
        #print("pose: Pose: lerp: given a pose1 of    " + str(pose1))
        #print("pose: Pose: lerp: given a pose2 of    " + str(pose2))
        displacement = Pose.add(pose2, Pose.neg(pose1))
        #print("pose: Pose: lerp: resulting in pose1  " + str(pose1))
        #print("pose: Pose: lerp: resulting in pose1  " + str(pose2))
        #print("pose: Pose: lerp: displacement is now " + str(displacement))
        progress = Pose.multiply(displacement, distance)
        #print("pose: Pose: lerp: resulting in pose1  " + str(pose1))
        #print("pose: Pose: lerp: resulting in pose1  " + str(pose2))
        #print("pose: Pose: lerp: progress is now " + str(progress))
        result = Pose.add(pose2, Pose.neg(progress))
        #print("pose: Pose: lerp: resulting in pose1  " + str(pose1))
        #print("pose: Pose: lerp: resulting in pose1  " + str(pose2))
        #print("pose: Pose: lerp: result is now " + str(result))
        return result[:]

    
    @staticmethod
    def getHeadRot(pose1): #thrice the head's X minus the sum of the X's of the feet and waist. a decentish approximation w/o trig.
        return (3 * pose1[3][0]) - pose1[0][0] - pose1[1][0] - pose1[2][0]


    @staticmethod            
    def getTailEnd(pose1): #a point which is exactly getTailLength(pose) to the left of getMidpoint(pose)
        midpt = Pose.getMidpoint(pose1)
        return [midpt[0] - Pose.getTailLength(pose1), midpt[1]]

    @staticmethod
    def getTailLength(pose1): #the average leg length
        return Pose.getMean([Pose.getDistance(pose1[0],pose1[2]), Pose.getDistance(pose1[1],pose1[2])])


    @staticmethod
    def getMean(inputList): #takes any lengthy list
        result = 0
        for item in inputList:
            result += item
        result /= len(inputList)
        return result


    @staticmethod
    def getMidpoint(pose1): #get the average of all points in a pose
        list1 = [0,0,0,0,0,0]
        list2 = [0,0,0,0,0,0]
        for point in range(len(pose1)):
            list1[point] = pose1[point][0]
            list2[point] = pose1[point][1]
        return [Pose.getMean(list1), Pose.getMean(list2)]


    @staticmethod
    def getDistance(in1, in2): #basic planar distance function: square root of ((x1-y1)^2 + (x2-y2)^2)
        return ((in1[0] - in2[0])**2 + (in1[1] - in2[1])**2)**0.5

description:

The Pose class isn’t a type that’s used to hold poses – it’s a collection of methods for acting on poses, which are just arrays of 6 tuples (coordinate pairs for feet, waist, neck, hands). The Pose class can add, multiply, and most importantly Lerp two poses together. Lerp is called to find every frame of an animation based on stored keyframes.


file animationUtility.py:

 from pose import *

def terpAnim(inputAnim, baseDuration, frameIndex):
    keyPair = int(frameIndex//baseDuration)
    #print("animationUtility: terpAnim: (keyPair=" + str(keyPair) + ",frameIndex=" + str(frameIndex) + ")")
    #print("animationUtility: terpAnim: inputAnim[" + str(keyPair) + "] is " + str(inputAnim[keyPair]))
    #print("animationUtility: terpAnim: inputAnim[" + str(keyPair+1) + "] is " + str(inputAnim[keyPair+1]))
    return lerpFrames(inputAnim[keyPair], inputAnim[(keyPair+1)%len(inputAnim)], baseDuration, frameIndex % baseDuration)

def lerpFrames(inputPose1, inputPose2, baseDuration, frameIndex):
    #print("animationUtility: lerpFrames: (baseDuration=" + str(baseDuration) + ",frameIndex=" + str(frameIndex) + ")")
    #print("animationUtility: lerpFrames: working with pose1: " + str(inputPose1))
    #print("animationUtility: lerpFrames: working with pose2: " + str(inputPose2))
    result = Pose.lerp(inputPose1, inputPose2, float(frameIndex) / baseDuration)
    #print("animationUtility: lerpFrames: resulting in pose1: " + str(inputPose1))
    #print("animationUtility: lerpFrames: resulting in pose2: " + str(inputPose2))
    return result

def frameCount(inputAnim, baseDuration):
    return (keyframeCount(inputAnim) - 1) * baseDuration

def keyframeCount(inputAnim):
    return len(inputAnim)

description:

The animation utility holds a few methods for playing animations, and is responsible for lerping the two appropriate keyframes to get any requested frame.


file animationLib3.py:

#06.24.16

anims = dict([
    ('IDLE',
         [
             [[0,0],[0,0],[0,0],[0,0],[0,0],[0,0]],
             [[0,0],[0,0],[0,0],[0,0],[0,0],[0,0]],
             [[0,0],[0,0],[0,0],[0,0],[0,0],[0,0]]
         ]
    ),
    ('JITTERTEST',
         [
             [[5,8],[-10,-14],[0,0],[0,0],[4,4],[20,8]],
             [[3,11],[7,4],[0,0],[0,0],[-5,0],[2,-11]],
             [[-4,-2],[-2,11],[0,0],[0,0],[-8,8],[-4,-5]]
         ]
    ),
    ('LIEDOWN',
         [
             [[-14.0, -65.0], [-74.0, -55.0], [-26.0, -2.0], [10.0, 12.0], [56.0, -11.0], [17.0, 0.0]],
             [[0,0],[0,0],[0,0],[0,0],[0,0],[0,0]]
         ]
     ),
     ('WALK',
         [
            [[0, 0], [0, 0], [0, 0], [0, 0], [0, 0], [0, 0]],
            [[32.0, -2.0], [-31.0, -4.0], [0, 0], [0, 0], [40.0, -4.0], [-36.0, -5.0]]
         ]
     ),
     ('JUMP',
         [
            [[32.0, -23.0], [-29.0, -23.0], [0, 0], [0, 0], [37.0, -4.0], [-34.0, -9.0]],
            [[0, 0], [0, 0], [0, 0], [0, 0], [0, 0], [0, 0]]
         ]
     )
])

def getAnim(keyword):
    return anims[keyword.upper()]

description:

These are the basic animations that made it into our final project. The speed couldn’t be set for each animation, and the movement of the character around the screen was handled by a different class – something I wasn’t aware of until after the game was finished. I would’ve incorporated that motion into these animations, but it’s probably for the best; this simple collection can’t be broken be resizing the window.

file frameRate.py:

"""
============== USAGE ==============
import using:
    from frameRate import FrameRate
create a FrameRate object to handle your frames:
    frames = FrameRate(number of frames per second)
at the end of every frame, do:
    frames.finishFrame()
this will hold the frame rate as near to the rate you specified as possible.
"""


import pygame.time
import time

class FrameRate:
    
    def __init__(self, rate):
        self.bias = Biaser()
        self.t1 = pygame.time.get_ticks()
        self.targetWait = 1000/rate

    def finishFrame(self):
        self.t2 = pygame.time.get_ticks()
        self.bias.addInput(self.t2 - self.t1)
        duration = max(0, self.targetWait - self.bias.getValue())
        time.sleep(duration/1000)
        self.t1 = pygame.time.get_ticks()


class Biaser:
    def __init__(self):
        self.value = 1.0/15.0
        self.last = 1.0/15.0
        self.shortCutoff = 1.0/120.0
        self.longCutoff = 1.0/12.0
        self.feedback = 0.5
        self.wetness = 0.7

    def getValue(self):
        result = (self.value*self.wetness) + (self.last*(1-self.wetness))
        return result

    def addInput(self, in1):
        self.value = (self.value*self.feedback) + (max(min(in1, self.longCutoff), self.shortCutoff)*(1-self.feedback))
        self.last = in1

description:

The first class I wrote that wasn’t part of my StickFigure. This object dynamically adjusts the wait period at the end of each frame to prioritize a stable framerate over a high one. It has cutoff values so that it can’t be majorly affected by crazy frames that take longer than 1/12 second (if the game is paused) or shorter than 1/120 second (supposing we accidentally called draw multiple times in a row). Thus it never needs to be turned off to preserve its vision of the perfect framerate.

And you’ll notice I’m getting better at commenting my code as time passes.


file soundEngine.py:

import pygame
import pygame.mixer
import time
import os


"""
 ============ USAGE ===========
 -import using:
     from soundEngine import *
     
 -initialize a SoundEngine:
     self.yourMusicThing = SoundEngine()
     
 -load music and effect before you need to use them:
     self.yourMusicThing.loadMusic()
     self.yourMusicThing.loadEffect()
     
 -play sounds from \sound\effect\ using:
     self.yourMusicThing.playEffect('sound ID')
     (when adding new sounds to \sound\effect\
     make sure to add them to the dictionary as well)
     
 -switch to new music from \sound\music\ using:
     self.yourMusicThing.setMusic("song ID")
     (songs are:
         - 'TITLE'
         - 'AMBIENT'
         - 'BATTLE'
         - 'BOSS'
         - 'WIN'
         - 'LOSE')
     switching to new music will stop the old music.

"""

class SoundEngine:

    pygame.mixer.init(24000, 16, 2, 4096)


    def __init__(self):
        print("sound engine: initializing...")
        self.soundSubdir = "\\sound"
        self.musicSubdir = "\\music\\"
        self.effectSubdir = "\\effect\\"
        self.container = ".ogg"
        self.currentMusic = 'AMBIENT'
        self.fadeDuration = 250
        print("sound engine: initialized")

    
    def loadMusic(self):
        print("sound engine: loading music...")
        print("     \"BlockMan\", \"Cyborg Ninja\", \"Danger Storm\", \"Pixelland\", \"Show Your Moves\"\n     Kevin MacLeod (incompetech.com)\n     Licensed under Creative Commons: By Attribution 3.0\n     http://creativecommons.org/licenses/by/3.0/\"")
        self.music = dict([
            #('TITLE', self.getSound(self.musicSubdir, "incompetech-spazzmatic_polka")),
            ('AMBIENT', self.getSound(self.musicSubdir, "incompetech-pixelland")),
            ('BATTLE', self.getSound(self.musicSubdir, "incompetech-cyborg_ninja")),
            ('BOSS', self.getSound(self.musicSubdir, "incompetech-blockman")),
            ('LOSE', self.getSound(self.musicSubdir, "incompetech-danger_storm")),
            ('WIN', self.getSound(self.musicSubdir, "incompetech-show_your_moves"))
        ])
        print("sound engine: music loaded")


    def loadEffect(self):
        print("sound engine: loading effect...")
        self.effect = dict([
            ('TEST', self.getSound(self.effectSubdir, "pocketTestTone"))
        ])
        print("sound engine: effect loaded")

        
    def getSound(self, subdir, soundName):
        return pygame.mixer.Sound(self.getFilepath(subdir, soundName))

     
    def getFilepath(self, subdir, soundName):
        result = os.path.realpath(os.getcwd()) + self.soundSubdir + subdir + soundName + self.container
        return result


    def setMusic(self, musicName):
        print("sound engine: switching music to " + musicName)
        self.stopMusic()
        self.currentMusic = musicName
        self.startMusic()


    def playEffect(self, effectName):
        self.effect[effectName].play(0,3000,0)


    def stopMusic(self):
        self.music[self.currentMusic].fadeout(self.fadeDuration)


    def startMusic(self):
        self.music[self.currentMusic].play(-1, 0, self.fadeDuration)

description:

This sound engine simplifies the loading of songs and sound effects. It allows us to change songs at random, and without worry of having two playing at once (remember MC-35856? that’s still a thing)

When the game starts, it credits Kevin MacLeod for his amazing music used under a Creative Commons Attribution license v3.0.

When I put the soundtrack together I was able to squeeze everything down to 32kbps or so with Ogg Vorbis, which became my new favorite audio codec. So the game takes only a second to launch.


During my stay at Rose, I improved my ability to work in a group with other programmers. And rediscovered that it’s fun. I gained a fascination for python. There is no language but python. All other languages are trash. I would delete them from my mind if python were faster by a factor of just a few hundred. (no, just kidding. I never delete anything)

At the end, we were awarded 5th place for best project, out of more than 40, spanning many fields of engineering.